Practical guide
What to check on rendered walls after prolonged wet weather
A long spell of rain is the best time to see how a rendered wall copes with water. Faults that stay hidden in dry weather show up as dark patches, drips, stains and soft spots. A careful look from the ground, with notes and photographs, tells you whether the render needs repair, whether something above or below it is the real problem, or whether it is simply wet and will dry out.

On this page
Why wet spells matter in Hull
Hull City Council's flood risk strategy describes the city as low-lying with little relief, shaped like a bowl and reliant on pumping, and explains that surface water pools in low spots when heavy rain cannot drain away. For a rendered house, that means the foot of the wall may sit beside standing water for hours after a downpour, and water splashing up from paving soaks the bottom of the render.
Render copes well with rain running down it. It copes badly with water getting behind it, through cracks, at edges and from below. A wet spell shows you where that is happening.

Start at the top
Stand back and watch the gutters during or just after heavy rain. Water spilling over the edge, dripping from a joint or pouring from behind a downpipe will be soaking the render below. These are the most common causes of stained, green or blown render, and they are fixed with a gutter repair, not a render repair.
Look along the top of the wall too. Where the render meets the soffit or roof edge, a dark line can mean water is getting in behind the top of the render.
Note which way the rain was driving. A wall that only shows damp patches when rain comes from one direction is telling you about exposure and the detailing on that side, which is useful when deciding whether a repair or a better-specified render is needed.
Sills, openings and fittings
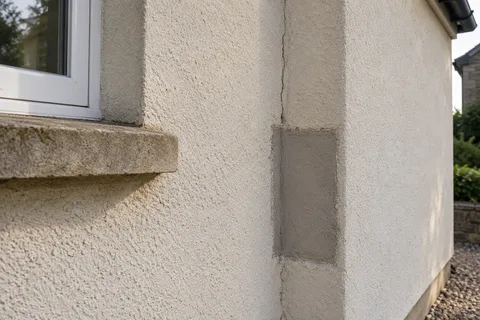
Each window sill should throw water clear of the wall with a drip under its front edge. After rain, a dark stain or a green streak below a sill corner means water is running back onto the render. Look at the joints between render and frame; a gap or split sealant there lets water into the reveal.
Check downpipe brackets and any fittings screwed into the render, such as lights, cable clips and satellite brackets. Water running down a pipe and into a fixing hole leaves a dark patch that stays after the rest of the wall dries.
If you find a stain in the same place each time, note it and plan a repair once the source is fixed and the wall has dried.
The bottom of the wall
This is where most problems in a flat city show. Look for render that is darker, softer or flaking in a band near the ground, white salt deposits, or render that runs straight down into the paving. RICS's consumer guide on bridged DPCs explains how material crossing the damp-proof course lets ground moisture move round it, and gives a path two bricks, about 150mm, below the DPC as its example. If the path or soil is higher than that, or the render bridges the DPC, the fix is to lower the ground and cut the render back to a bell-cast bead above the DPC.
Standing water against the wall after rain is a drainage question. Blocked gullies, paving that falls towards the house and downpipes that empty onto paving rather than into a drain all keep the base of the wall wet.
Hollow patches and cracks
Once the wall is dry again, tap the render at reachable height with the handle of a screwdriver. Areas that sound dull have lost their bond to the brick. Wet weather followed by frost is hard on render that has already started to part from the wall, so compare with any earlier notes and see whether hollow areas are growing.
Photograph cracks with something for scale. Fine crazing that does not change is usually only surface shrinkage. Cracks that open wider, run diagonally from window corners or line up with cracks inside the house need a closer look, and wide or growing cracks are a question for a surveyor before any render work.
Green growth and salts
Algae and moss grow where render stays damp: north-facing walls, walls under trees and the area below a leaking gutter. Green growth on its own is mostly a cleaning job, but it is also a map of where the wall is wettest, which helps find the leak. Clean it with a product suited to the finish and gentle water pressure.
White, fluffy or crystalline deposits are salts carried out of the wall by evaporating water. They show that water is moving through the wall at that point. Brush them off dry and look for the source, rather than painting over them.
After water has stood against the wall
Hull's flood strategy lists the surface water flooding of June 2007 among the city's most significant flood events, and notes that surface water flooding can happen anywhere. If water has stood against a rendered wall, even for a few hours, expect the bottom of the wall to stay wet for weeks. Let it dry out fully before any repair is attempted.
As it dries, watch the bottom metre of render. Salts may come out as white deposits, and render that was already loose may blow or flake. Tap it again once it has dried. Areas that have lost their bond need cutting out and repairing, with the render stopped on a bead above the DPC rather than run back down to the ground.
Write down how high the water reached and for how long. It helps anyone assessing the wall later, and it tells you which walls to watch most closely in the next wet spell.
When to act, and when to wait
Do not repair render on a saturated wall. SPAB advises delaying re-rendering while the fabric of a wall is saturated, and render applied over wet brick bonds poorly. Fix the gutter, sill or drainage first, let the wall dry, then repair the render. Loose render over a path or doorway is the exception: have it made safe straight away.
Keep the photographs and notes with the date of the rain. If you ask for an assessment, they show exactly where the water went. The Hull rendering homepage sets out the services if the check points to more than a repair.
See housing and planning information for Hull and nearby places, including the source and geography behind each figure.