Repairing damaged render
Render repairs in Hull
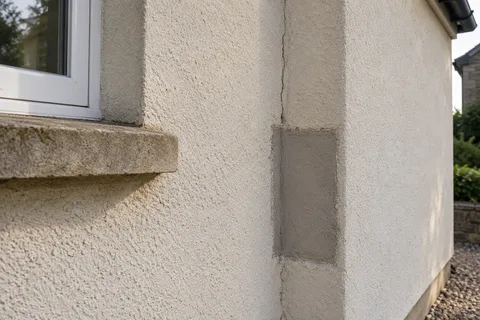
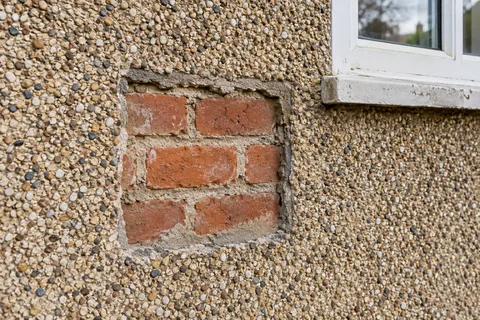
Most render damage is local: a hollow patch beside a bay, a crack under a sill, a crumbling band at the foot of a wall. A repair cuts that area out to sound render, puts right what caused it and rebuilds the coats to the same thickness as the wall around it. The aim is a weather-tight wall, and a patch that blends as well as old and new render can.

On this page
What the symptoms usually point to
Each pattern of damage has a usual cause, and the cause decides the repair.
| What you see | Usual cause | Typical repair |
|---|---|---|
| Fine crazing over the surface | Shrinkage of a rich top coat | Often cosmetic; a suitable coating can bridge it |
| Diagonal crack from a window corner | Stress concentrated at the opening | Cut out, rebuild with mesh across the corner |
| Hollow sound, no visible crack | Render has lost its bond | Cut out the whole hollow area and re-render |
| Crumbling band near the ground | Wet base, render bridging the DPC | Cut back, finish on a bell-cast bead above the DPC |
| Stain or green streak under a sill | Water running off a sill without a drip | Fix or extend the sill, then repair and clean |
- Map the damage Tapping finds hollow areas; cracks and their likely cause are noted.
- Cut back Failed render is cut out to a sound edge, usually squared off.
- Fix the cause Leaking gutters, sills without drips or render below the DPC are dealt with.
- Rebuild in coats Using a material compatible with the surrounding render and masonry.
- Blend the finish Texture is matched; colour may need a coating over the wider area.
The usual order of work. The survey and the chosen products decide the actual steps.
Finding the true size of the damage
The visible crack is rarely the edge of the problem. Knock outwards from it with the butt of a screwdriver until the dead note turns to a clear one, and chalk that line. The repair is everything inside it, plus a small margin into sound render.
Cracks that are wide, that line up with cracks in the brickwork or inside the house, or that reopen after repair suggest movement in the building rather than in the render. Those need a surveyor or engineer to look at the cause before any render is patched. And if loose render overhangs a path or a shared passage, keep people clear and have it taken down rather than tugging at it.
How a render patch is rebuilt
For cement render on brick, the sequence is the same whether the patch is the size of a hand or a whole bay.
Cut round the marked area with a disc so the edges are straight and sound.
Break out the failed render back to the brick and brush out the dust.
Repair soft bricks and rake out crumbling joints; fix the leak, sill or bridge that caused the damage.
Wet the brick and the cut edges so the new render does not dry too fast against them.
Apply an undercoat a little below the surrounding face, embed mesh across window corners if needed, and scratch it.
Let the undercoat dry, then apply the finish flush with the old render and match the texture.
Shield the patch from rain, frost and strong sun while it cures.
Reveals after new windows
Replacing windows often leaves the render around them broken: chipped reveals, a ragged line where the old frame came out, and a gap under the new sill. The repair cuts the reveal back to sound render, then sets a stop bead tight to the new frame; Renderplas's guide for its beads shows stop beads pushed into reveals against window and door frames, with corner beads on the external angle. The render is pressed into the bead edges so no air pockets are left behind them.
Check the new sill before the render is repaired. It should project past the finished face with a drip groove underneath, or the patch below it will stain and fail again.
The base of the wall after wet weather
Hull City Council's flood strategy describes the city as low-lying and bowl-shaped, with surface water pooling in low spots when heavy rain cannot drain away. A wall that has stood in water, or whose render runs down into wet paving, often shows it first at the base: soft, blown or flaking render a few courses up. Repairs there should cut the render back and stop it on a bell-cast bead above the DPC instead of patching it to the ground. Catnic sells its bell-cast bead for exactly this position, at DPC level, so that water drips off clear of the brick beneath. For the ground, the RICS guide to bridged DPCs works on a drop of two brick courses, roughly 150mm, from DPC to path.
Give a soaked wall time to dry before patching. SPAB advises delaying re-rendering while the fabric of a wall is saturated.
Making a patch blend
Copy the existing coat structure. For two-coat cement render, MPA Mortar's sheet gives roughly 10–12mm for the undercoat, dried out fully, and 8–10mm for the top coat. On lime render, the repair should be lime too; SPAB describes local repairs to hollow or decayed patches as the right approach for an otherwise sound lime coating. On a through-coloured monocouche, the same product helps, but Parex notes that shade varies with scraping time and between batches, so a perfect match is unlikely.
New render will look cleaner than a weathered wall. A colour change over the whole elevation once the repair has cured is the reliable way to make it disappear from the street.
Common questions
Should a crack be filled straight away?
Not with sealant or ready-mixed filler on the wall face. Note where it is and whether it grows, check for a leak nearby, then have it cut out and repaired in render when the wall is dry enough.
Why do repairs crack around their edges?
Usually because the patch was built up in one thick coat, the edges were ragged and dry, or the cause, such as a leaking gutter, was never fixed.
See housing and planning information for Hull and nearby places, including the source and geography behind each figure.