Lime render and repairs
Lime rendering in Hull
Lime render is bound with lime instead of cement. It stays softer and more open, so an old solid wall behind it can take up rain and dry out again rather than holding the moisture in. It is applied in several thinner coats, each left to firm up, and it needs shelter from frost, sun and heavy rain while it cures.

On this page
When lime is the right material
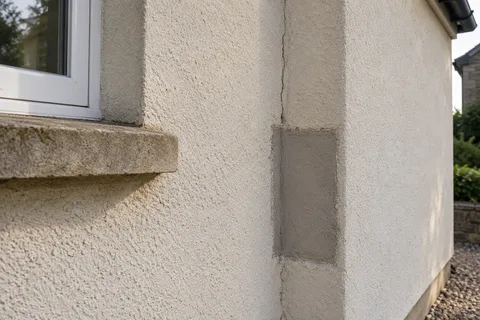
The case for lime is strongest on solid walls of older, softer brick or stone laid in lime mortar. SPAB explains that impervious cement render restricts evaporation from such walls, that its rigidity causes hairline cracks which let water in, and that water then struggles to get out. Typical symptoms are damp patches on the inside of an outside wall, a hard grey render covered in fine cracks, and hollow sections that come away in slabs.
Cement render that is still firmly stuck to a dry wall can sometimes be left alone, with local repairs, because removing it can damage the face of the brick. That judgement is made wall by wall after tapping and a small trial.
Where the cement does come off, how it is removed matters. SPAB recommends hand tools, a test area first and great care, because levering off large sheets can tear away the soft faces of old bricks. Expect some brick repairs and repointing in lime before the first coat, and allow a wet wall to dry out before it is re-rendered.
- Stone or brick masonry Cleaned of loose material and dampened so it does not draw water out too fast.
- First (scratch) coat Often haired; scratched to give the next coat a key.
- Second (floating) coat Applied once the first has firmed up; follows the line of the wall.
- Finish coat Thin final coat, kept damp and shaded while it cures.
- Limewash or mineral paint Optional decoration that keeps the wall permeable.
Wall on the left, finish on the right. Not to scale: coats, thicknesses and primers follow the chosen manufacturer’s system and the condition of the wall.
Deal with the water first
In a flat, low-lying city, the base of a wall is where water gathers. Before any render goes on, Womersley's guidance for natural hydraulic lime (NHL) renders says to check a saturated wall for the cause: faulty gutters or downpipes, cracks and other routes for water. Those are fixed first, and cracks in the masonry are cleaned out, packed with clay tile or slate where needed and pointed in NHL mortar, then left to cure for a day or two.
Then the bottom detail: the render should stop above the DPC rather than run to the ground, and paths should sit well below it. The RICS consumer guide to bridged DPCs uses a drop of two brick courses, roughly 150mm, from DPC to path as its example.
How a three-coat lime render is built up
Womersley's guidance sets out three-coat work in NHL. The waiting times stretch out in cold, damp weather.
Dampen the wall the day before, several times if the brick is thirsty, starting at the top; dampen again just before work.
Where the background is smooth or variable, apply a stipple or spatterdash coat of 3–5mm.
After about two days, apply the scratch coat at 10–15mm, never more than 20mm in one go, and key it in a criss-cross pattern with a pointed lath.
Bed metal mesh at least 100mm either side of any change of material, such as a timber lintel.
After three or four days, apply the float coat at 10–15mm, scour it back with a devil float and re-key it.
Leave it three to seven days, then apply the finish: up to 5mm for a smooth or light texture, 7–8mm for roughcast.
Shade and protect each coat, and dampen it lightly if it starts drying too fast.
Curing and the weather
Lime work is weather-sensitive. Womersley's says work should not start in frost or below 5°C, or 8°C for NHL 2 and fine finishing coats. Mortars made with NHL 3.5 should be protected from frost, heavy rain, strong wind and direct sun for at least 72 hours. The preferred cover is damp hessian, re-damped as it dries, which also helps the lime cure. Plastic sheeting keeps rain off but should not touch fresh work and does not stop frost, and frost protection goes on whenever frost is forecast overnight.
Shading sheets or debris netting on the scaffold stop drying winds and sun from cracking the surface. Womersley's also stresses that each coat should be weaker than the one before it.
Finishes and heritage areas
Lime render is finished with limewash or a breathable mineral or lime-based paint. SPAB warns that ordinary modern masonry paints are less permeable and can trap moisture, and advises against clear water-repellent treatments. Womersley's notes that NHL paints can be washed but should not be pressure-sprayed.
If the house is in one of Hull's conservation areas, including older village cores such as Sutton Village or Marfleet Village, ask the council before changing the render or its colour. Hull's Article 4 directions control some alterations in specific areas, and the council can tell you what applies at the address.
Common questions
Can lime render be used on a modern wall?
It can, but its main benefit is compatibility with older solid walls. On new blockwork a cement-based or silicone system is more usual and quicker to complete.
Why does lime render take so long?
Each coat has to firm up and shrink before the next goes on, and the work needs days of protection after each coat. Rushing it leads to cracking and poor bond.
See housing and planning information for Hull and nearby places, including the source and geography behind each figure.