Practical guide
Which rendered elevation should be repaired first?
When the render on several walls needs attention, the order of work matters. The front may look worst, but the wall letting water in, or the one dropping render over a path, usually comes first. A sensible order deals with safety, then water, then damage that will spread, and leaves purely cosmetic work until last, ideally in one go so the finish matches.

On this page
First: anything that could fall
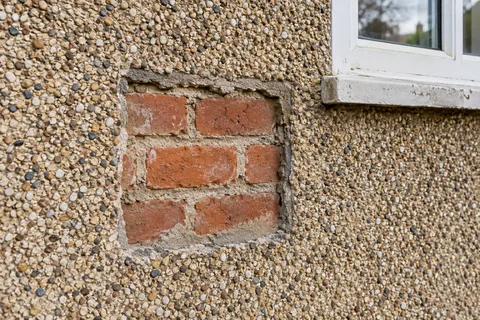
Render that has come away from the wall can drop without warning, especially after frost or a wet spell. If a hollow, bulging or cracked area hangs over a path, a doorway, a shared passage or a neighbour's yard, it goes to the top of the list. The first job may simply be to take the loose area down safely and protect the exposed brick, with the full repair later. Keep people away from it in the meantime and do not try to test it from a ladder.
Beyond safety, a wall that lets rain in behind its render will deteriorate fastest. A patch repair there, done promptly, is usually smaller than the job it prevents.
Where an elevation has a lime finish, the repair has to be in lime too, which affects timing, because lime work needs warmer weather and longer protection than cement.


Second: walls where water is getting in
Look for damp patches on the inside of an outside wall, stains running down from sills, green streaks behind downpipes and crumbling render at the base. Each points to water getting into or behind the render, and each gets worse with every wet season.
In Hull, the base of the wall deserves particular attention. The council's flood risk strategy describes a low-lying, bowl-shaped city where surface water pools in low spots after heavy rain. Render that runs down over the damp-proof course, or a path that has risen to meet it, keeps the bottom of the wall wet. RICS's consumer guide on bridged DPCs uses a path two bricks, about 150mm, below the DPC as its example. Cutting render back to a bell-cast bead above the DPC on the worst-affected wall is often a priority repair in its own right.
Third: damage that spreads
Some damage grows. A hollow area enlarges as frost and water work behind its edges. A crack at a window corner lets in water that loosens the render around it. These walls come next, while the repair is still a cut-out patch rather than a whole elevation.
Tap each wall with a screwdriver handle and chalk round the dull-sounding areas. Photograph them with the date. Doing the same a year later shows which areas are growing and which have stayed the same, which is good evidence for deciding the order.
Exposure and the weather side
Walls facing the prevailing weather, or open ground with nothing to shelter them, take more rain and wind than sheltered ones, and their render often fails first. Gable ends and the upper part of walls under short roof overhangs are typical. If two walls are in similar condition, the more exposed one generally goes first.
Exposure also affects the materials. The Mineral Products Association data sheet recommends three-coat cement work where exposure is severe, and Parex asks to be contacted about very severe wind-driven rain and coastal locations before its monocouche is specified. Ask whoever is quoting what exposure they have assumed for each wall.
Fitting repairs round other work
Other planned work changes the order. If windows are being replaced, do it before the reveals are re-rendered, so the stop beads go tight to the new frames. If gutters, fascias or the roof edge are being renewed, do that before the render below them, so water is under control and the top edge of the render is formed against the finished roofline. Both trades can often share one scaffold if the sequence is agreed.
Measure the proposed work as well as the visible defects. Several repairs can become a substantial renovation when their areas are added together. For dwellings, Approved Document L uses more than 50% of an individual thermal element, or more than 25% of the external building envelope, as the renovation thresholds for a thermal upgrade where feasible. Its external-render diagram uses the elevation containing the work. Give building control the planned areas across all phases, not just the first wall. Their response belongs in the scope sent to every contractor, so one price does not quietly omit insulation that another includes.
Last: appearance
Once the walls are sound and dry, cosmetic work can follow: recolouring faded render, evening out a patchwork of repairs, or changing the colour of the whole house. Doing this last, in one go, avoids repainting walls twice and gives an even finish over old render and new repairs. Repairs should be left to cure before any coating goes over them.
If you want the front to look better sooner, there is nothing wrong with doing it first, as long as nothing more urgent is waiting on another wall and the later repairs elsewhere are planned to be coated to match.
A worked example
Imagine a hypothetical end terrace with three problems: a bulging area above the back door, faded and patchy render on the front, and crumbling render at the base of the gable where a path has been raised. A sensible order would be to take down the loose render above the back door straight away and make it safe; then cut back the gable base, lower the path, fix a bell-cast bead above the DPC and repair; then repair the back wall properly; and finally coat the front, and possibly the whole house, once every repair has cured. The example is illustrative, not a prescription for any real house.
If scaffold is needed on more than one wall, it can make sense to group those walls into one visit, even if one of them is less urgent.
Seasons and scheduling
Cement, monocouche and silicone renders all have minimum temperatures and should not be applied in frost or rain. Lime needs warmer and longer conditions still; Womersley's guidance for natural hydraulic lime renders asks for no work below 5°C and protection of NHL 3.5 work for at least 72 hours from frost, heavy rain, strong wind and sun. Urgent safety work can happen at any time, but full repairs and coatings are best planned for the drier, milder part of the year. The Hull rendering homepage covers the other services if the survey points to different work.
See housing and planning information for Hull and nearby places, including the source and geography behind each figure.