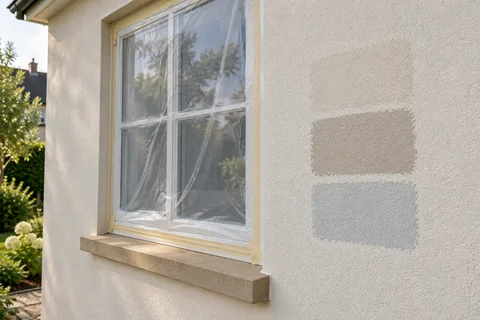
Silicone render systems
Silicone rendering in Hull
Silicone render is the thin, coloured skin on the outside of a render system. It comes ready-mixed in tubs, is troweled on only as thick as the grains of sand in it, and is rubbed up to a fine, even texture. Everything that makes the wall flat, strong and weather-tight sits underneath it in the basecoat.

On this page
What the finish is
ProRend Colourtex is a typical example. SAS Europe describes it as a factory-batched silicone resin thin coat render in two textures: Uniform, with a 1.5mm grain and a tight finish that resembles painted sand and cement, and Grained, a 3mm grain with a dragged, more rustic texture. The resin is flexible enough to take small movements in the wall, the surface is highly water-resistant, and the product contains biocides to slow the growth of algae and mould.
Because the top coat is only 1.5–3mm, it cannot level a wall or bridge a gap. Each manufacturer sells it as part of a system with a basecoat, often reinforced with mesh, and a primer tinted to the same colour as the finish. Choosing between the two grains is mostly about looks: the finer grain reads as almost smooth from the street, while the coarser one gives a deliberately rough, dragged surface that can be worked in random or vertical strokes.
- Sound background A background accepted by the specified system. Keeping old render requires a system-specific assessment of its bond and condition.
- Beads Corner, stop and base beads set the edges and straight lines.
- Basecoat with mesh Glass-fibre mesh embedded in the basecoat resists cracking.
- Primer Where the system requires it, tinted towards the finish colour.
- Silicone finish A thin, through-coloured, water-repellent coat that forms the texture.
Wall on the left, finish on the right. Not to scale: coats, thicknesses and primers follow the chosen manufacturer’s system and the condition of the wall.
What it can go on
SAS lists lightweight blockwork, new sand-and-cement render, brickwork, precast concrete, render carrier board, external insulation and existing unpainted render among suitable substrates, each prepared to its specification. In practice that covers most new extensions and most re-renders where the old coat has been removed or found sound.
It does not suit a wall where the existing render sounds hollow when tapped, a painted surface that has not been stripped or treated, or an older solid wall that relies on lime and needs to breathe freely. On a Victorian brick terrace in a conservation area, it is also a change of appearance: the government's permitted development guidance treats new render there as cladding that needs a planning application.
How a silicone finish is applied
The order below follows SAS's outline for Colourtex, with the wall preparation that comes first on a re-render.
Strip failed render, repair the brick or block and fix beads at the base, corners and reveals.
Apply the basecoat, embedding reinforcing mesh where the specification requires it, and float it flat.
Let the basecoat cure, then brush or roll on the tinted primer over the whole area.
Wait at least 24 hours for the primer, which carries fine quartz to give the top coat a key.
Trowel the silicone on with a hawk and trowel, kept tight to the grain thickness.
Within roughly 10–20 minutes, work the grain with a PVC float to raise the texture.
Carry each wall through without a break, keeping a wet edge between scaffold lifts.
Bays, scaffold lifts and damp days
Lap marks are the classic silicone fault: a visible band where one section dried before the next was worked into it. They appear at scaffold lifts, around bays where the operative moves between narrow faces, and where sun or wind dries one part faster. A canted bay, like those on the Victorian terraces of Ella Street described in Hull City Council's appraisal, needs enough people to keep every face wet at once.
Damp air slows the cure. JUB's guidance for its own textured finishes notes that humidity above 85% delays drying, and it rules out work below 3°C on a rising thermometer or 5°C on a falling one. On a still, damp day a fresh coat can stay soft for hours, so sheeting stays on the scaffold until the finish has firmed up, and work stops when rain is due.
Cleaning, repairs and recoating
SAS says Colourtex can be pressure-washed to clear dirt or organic growth, and that it should be overcoated with paint periodically to keep the system in good order, at least every 12 years depending on site conditions. North-facing walls, walls behind trees and areas under leaking gutters will need cleaning sooner than open, sunny elevations. Overcoating means a compatible masonry coating applied over the existing silicone, not a new render, so ask the system maker which product it approves before buying paint.
Small knocks can be patched with the same product, but a patch on a weathered wall usually shows. Keep the product name, texture and colour code, because a later repair or colour change should start from the same system rather than a guess.
Common questions
Is silicone render waterproof?
The surface sheds water well, but the wall's protection depends on the whole system, including beads, sills and the detail at the DPC. Cracks in a poor basecoat will still let water in.
Why is the primer coloured?
It is tinted to match the finish so the thin top coat does not show grey basecoat through the grain, and it gives the silicone a gritty surface to grip.
See housing and planning information for Hull and nearby places, including the source and geography behind each figure.